How to make Dolphin Bikes! -or- How to stay up all night on LED.
Try to get as much done before we get to playa! I will have some supplies and 'know-how' to help finish and attach the dolphins to your bike on playa if needed, but it is always easier to get this done beforehand.
Get ready to ride in the wake of some art cars!!!
STEP 1. CUT OUT PIECES
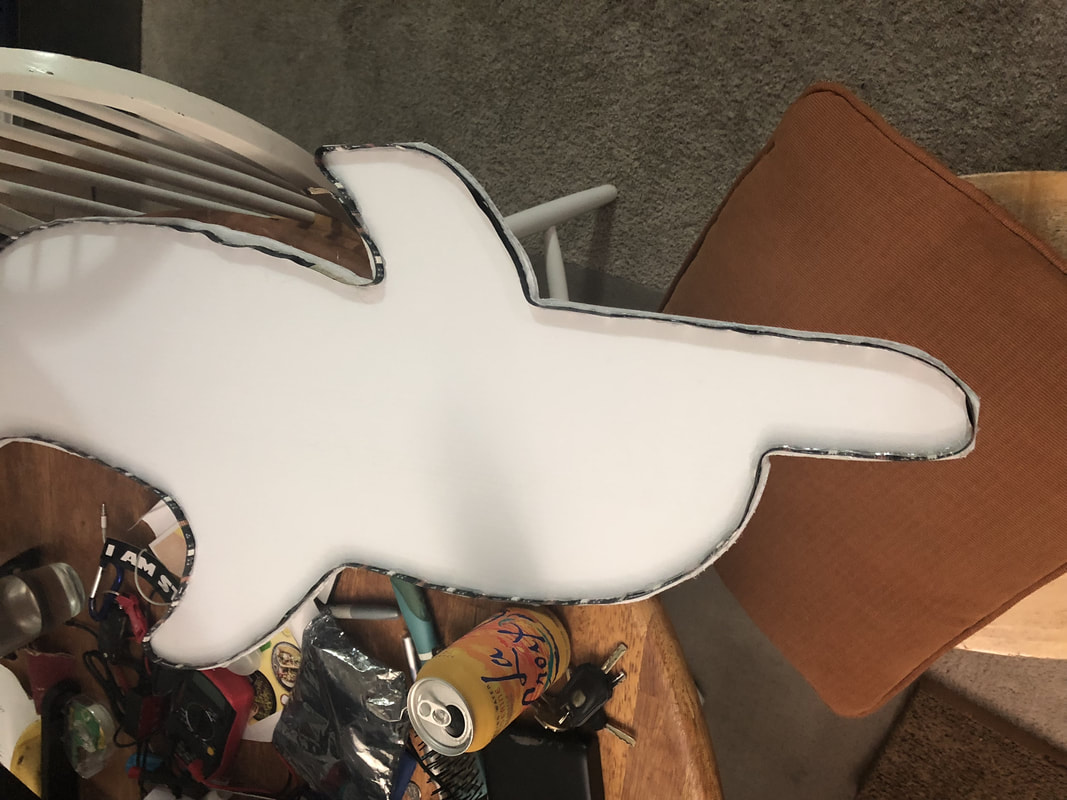
Cut out 4 pieces from the coroplast (2 dolphin body sides and 2 sides of the tail). Dana has outlined these shapes already on some of the coroplast sheets. I used an xacto knife to cut out the shapes and some medium grit sandpaper to smooth out the edges.
STEP 2. GLUE ON THE LED LIGHTS
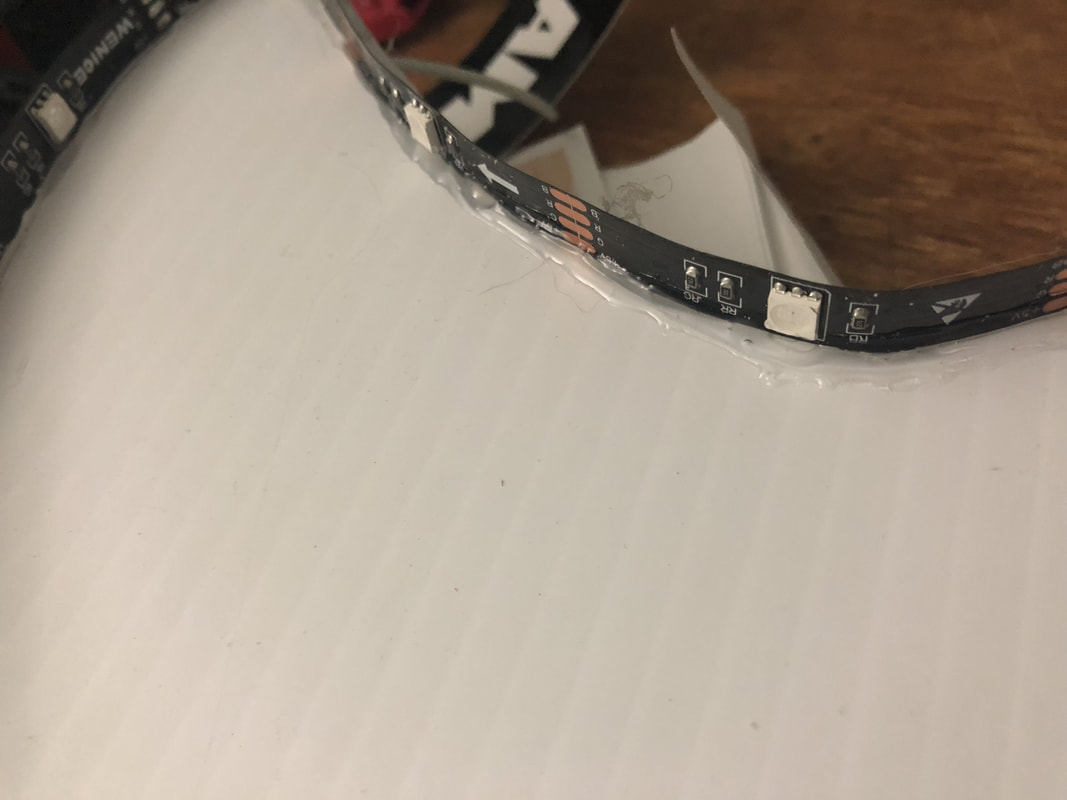
I am putting together a 15 foot length of an LED strip for each dolphin. These should be ready on Wednesday, so if you don't have them (everyone outside of Dana, Leslie, and I) you need to contact me to arrange a hand off. I have been attaching the LEDs, perpendicular to one side of the dolphin body using a hot glue gun. I have started at the pectoral fin and stay about 1/2 inch away from the edge. I try and put glue on each side of the strip and work about 6 inches of the strip at a time. 15 feet should be long enough to go around the entire perimeter, including the tail.
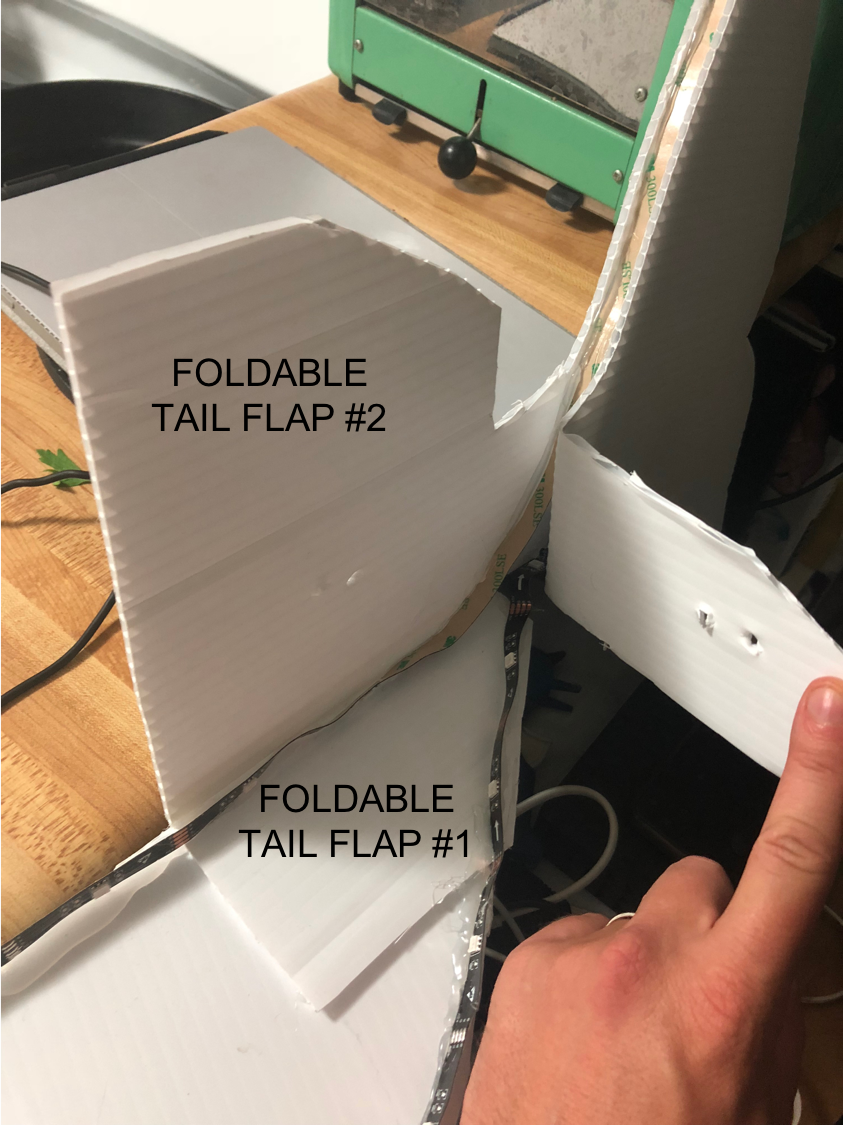
Once you get to where the tail will attach, you will need to glue on 'foldable tail flap #1' (on the top tail piece) to the body. Once you glue the LEDs all the way around the edge of the tail, you can bring them back onto the body and work your way back to the starting point at the pectoral fin.
STEP 3. COMPLETING THE TAIL
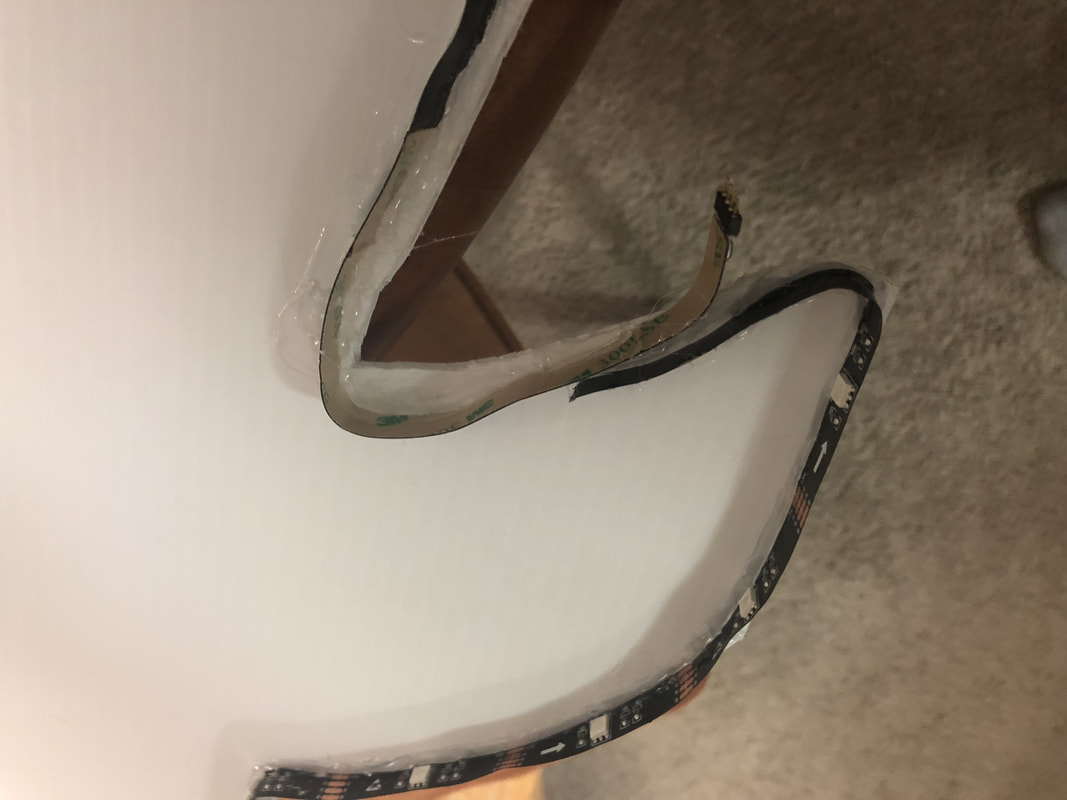
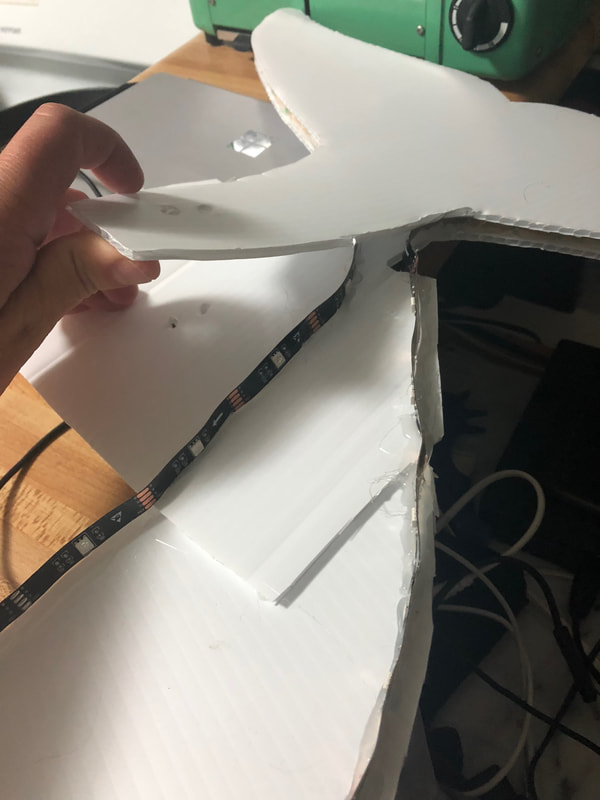
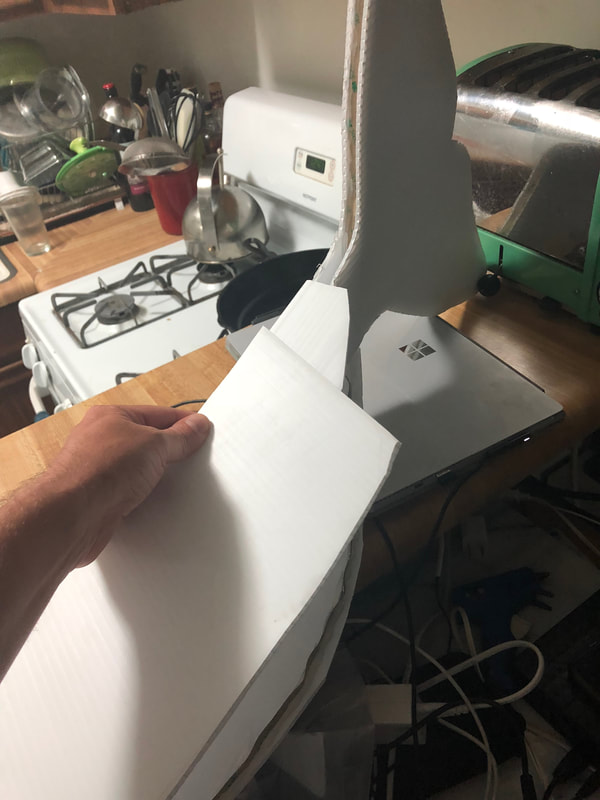
Once you have the LEDs all glued on, you can glue the other side of the tail to the LED strip (shown in the pictures above). You then fold the tail over so that it is perpendicular to the body (as shown in the picture above). *REMEMBER a dolphin is a mammal so its tail moves up and down and not side to side* You will now be ready to glue to other side of the body to 'foldable tail flap #2'. Make sure that the body pieces line up and are flush at the nose, dorsal fin (top), and pectoral fin (bottom). See image below.
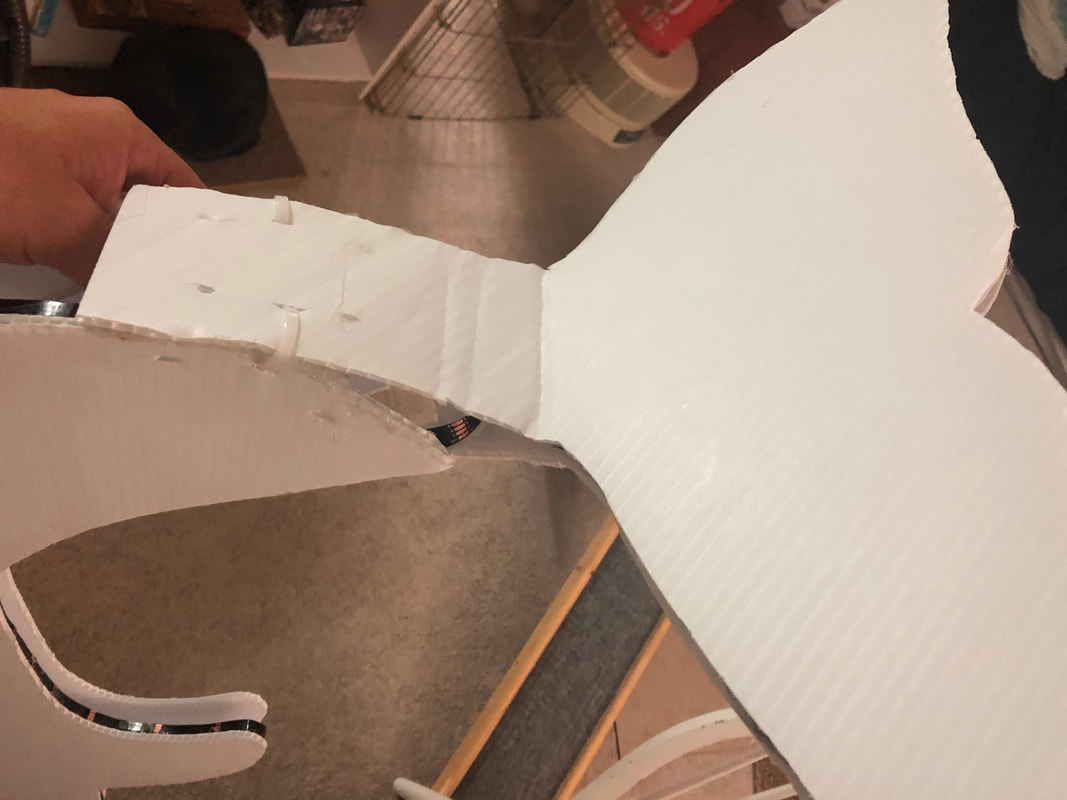
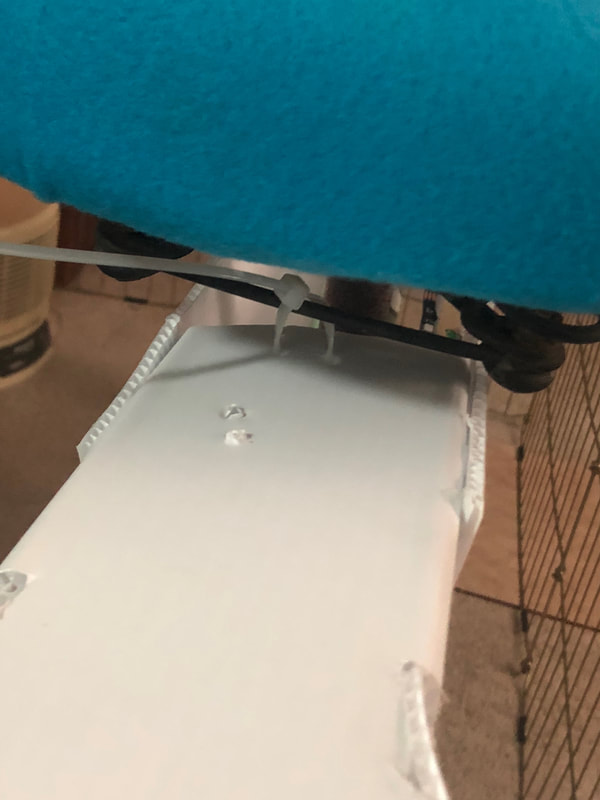
You can then attach the flap from the bottom tail piece to the two halves of the body using zip ties and glue. You may need to form the body pieces near the back into a more streamlined shape by cutting off some of the excess material. We will use some excess coroplast to cover any gaps between the tail and the body, like the ones seen in the picture below.
STEP 4. ATTACHING THE DOLPHIN TO THE BIKE AND FINISHING UP
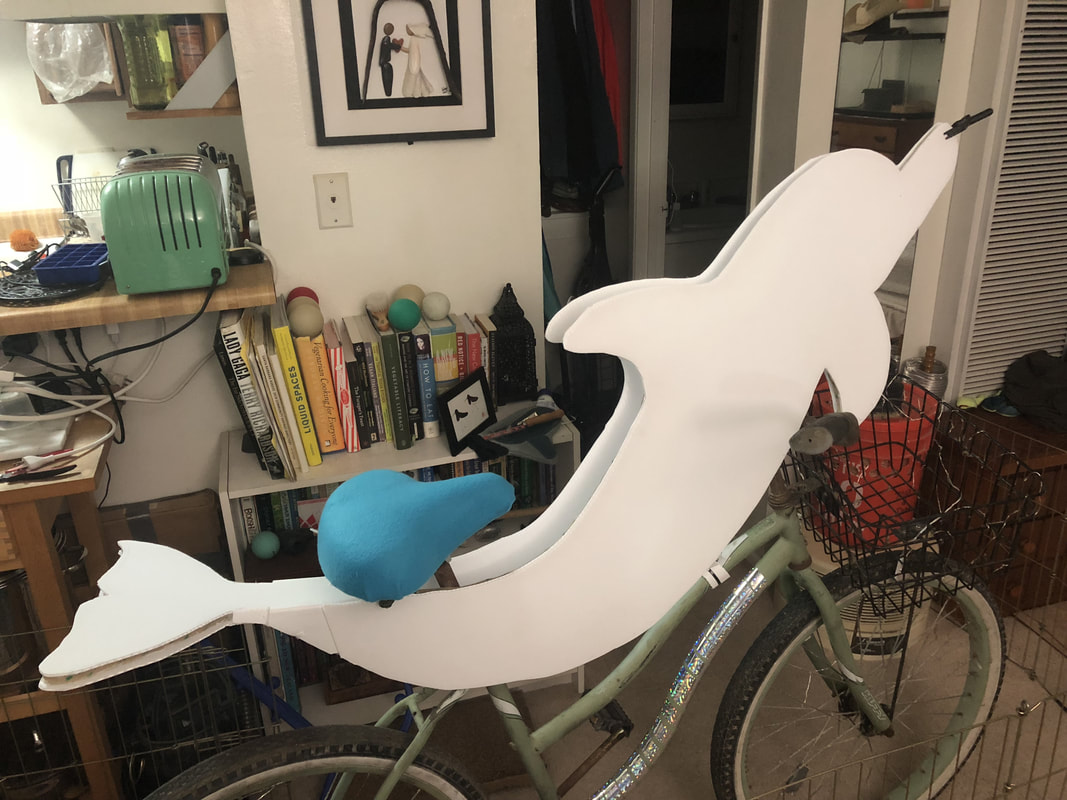
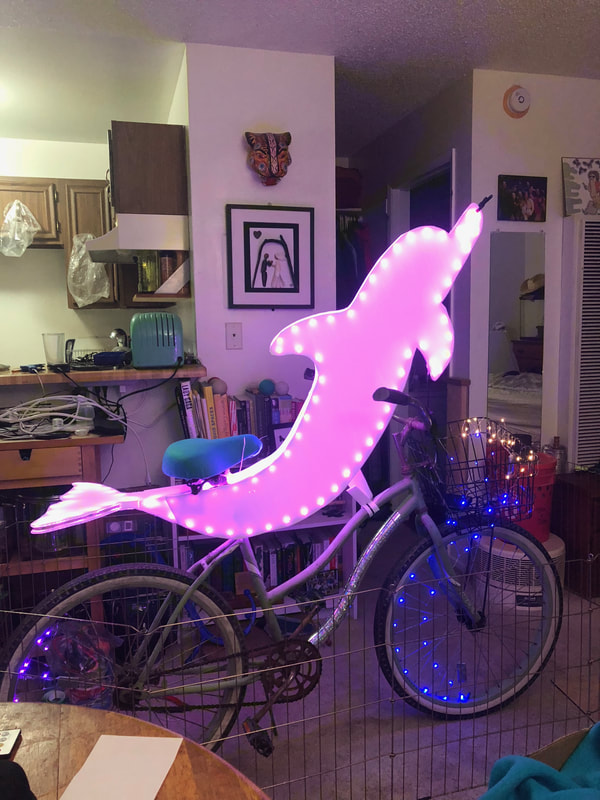
The dolphin body pieces will now be attached to each other at the tail but open in the front. Slide the dolphin onto your bike from behind the seat. The tail will now rest just behind the seat post and the body to stretch out over your handlebars. You will now attach the tail to your seat post or to the underside of your seat with a zip tie. The body will be supported by some of your extra coroplast pieces, which we will glue together and zip tie to the bike frame (see picture below). Lastly, we will glue and zip tie the dolphin body pieces together near the front. You may need to cut a channel in the upper tail piece to slide the dolphin forward if you are having trouble sitting on your bike seat. Most of these steps will be completed on playa. I will be bringing my glue gun and tools (including solar power supply) as well as some thin foam to seal the open areas between the body pieces.
STEP 5. LED COMPONENTS
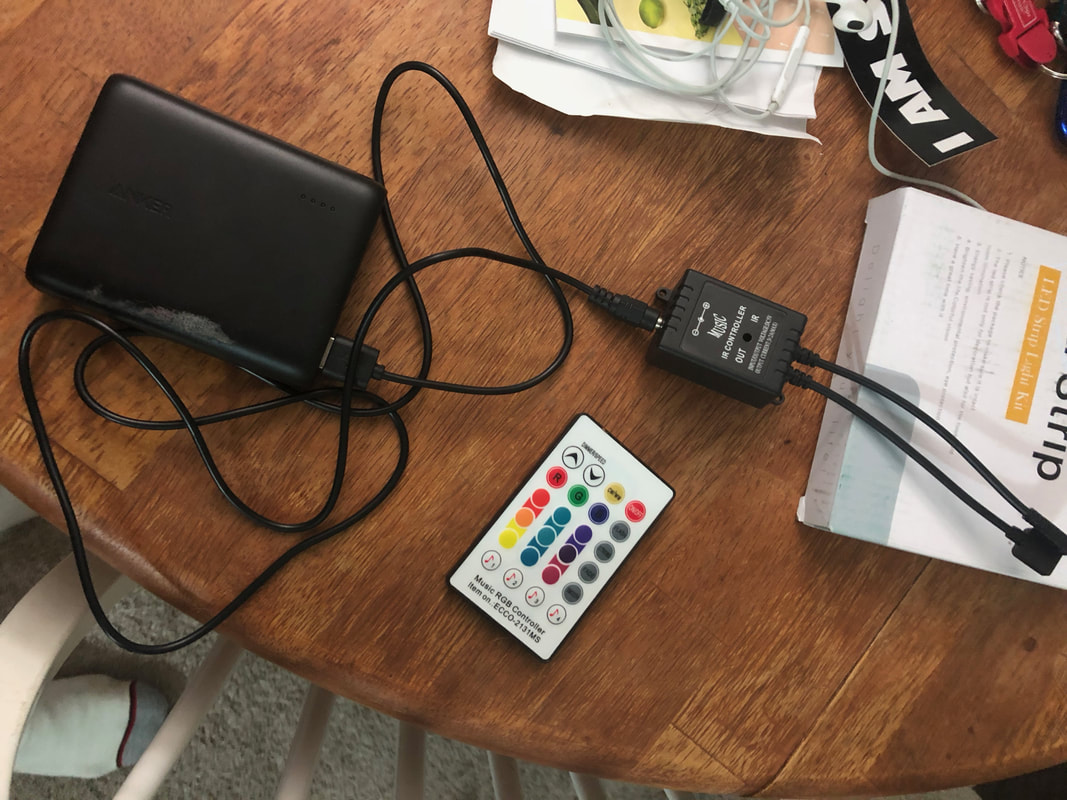
There are a few components to understand. The first is the control box, this includes the circuit board, controller, and microphone inside a small black box. One end accepts the power source (a USB battery charger which you will supply) from an included USB cord, and the other side plugs into the 4-pin LED strip. Make sure the arrow is lined up with the 5V symbol on the LED strip. You also have a remote which uses an infrared (IR) light to transmit a signal to the other wire coming off the control box. I think that Music Mode 4 (music note with a number 4) will be the best mode, but we will have to play with the sensitivity on playa. The 'Fade' mode is also very visually appealing. We will be taping or zip tying the USB battery charger and control box to our bikes.

